C2-Bonus_Unit_1-Introduction_to_Deep_Reinforcement_Learning_with_Huggy-C2-Train_Huggy
中英文对照学习,效果更佳!
原课程链接:https://huggingface.co/deep-rl-course/unitbonus2/optuna?fw=pt
Let’s train and play with Huggy 🐶
让我们和Huggy🐶一起训练和玩耍

![]()
在Colab中公开提问
Let’s train Huggy 🐶
让我们训练Huggy🐶
To start to train Huggy, click on Open In Colab button 👇 :
要开始训练Huggy,请单击在Colab中打开按钮👇:
![]()
在Colab开业
In this notebook, we’ll reinforce what we learned in the first Unit by teaching Huggy the Dog to fetch the stick and then play with it directly in your browser
奖励单元1缩略图在本笔记本中,我们将通过教小狗Huggy取出棍子,然后直接在浏览器中玩它来巩固我们在第一单元中学到的内容
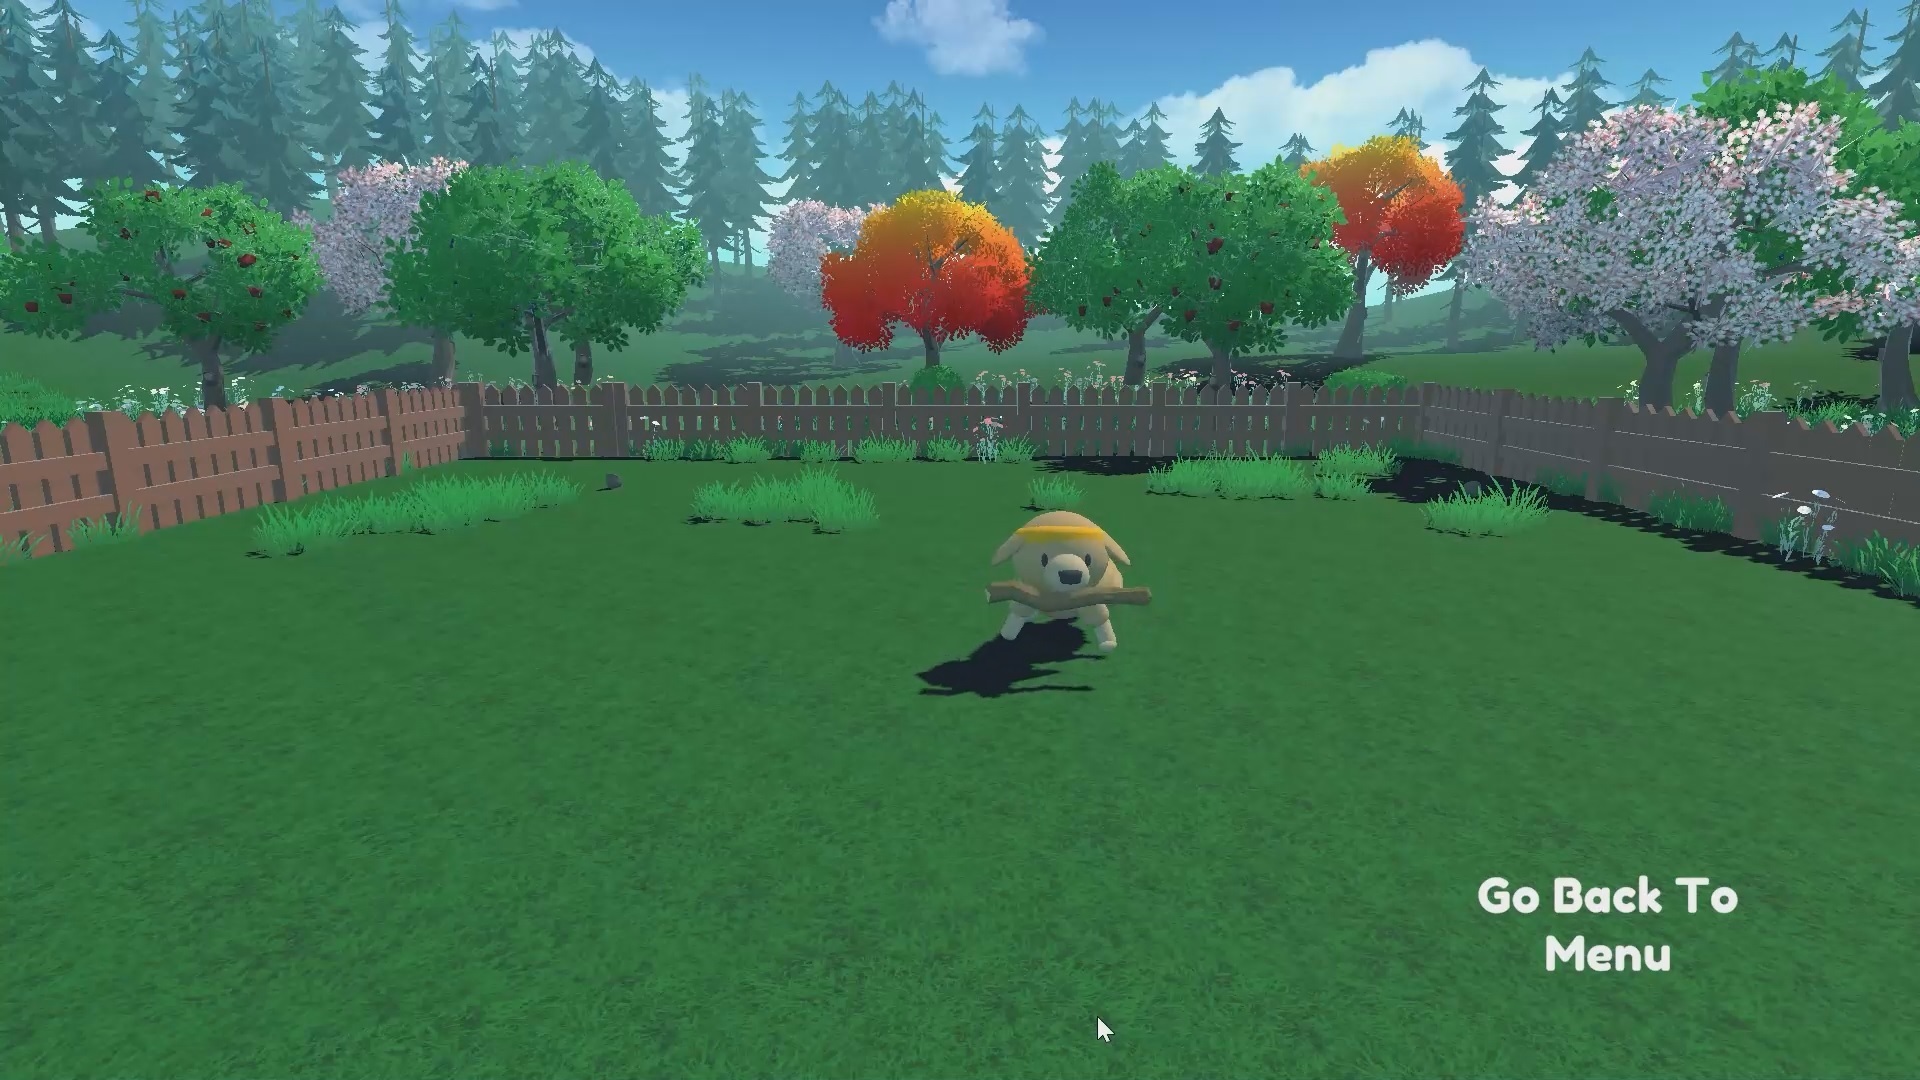
⬇️ Here is an example of what you will achieve at the end of the unit. ⬇️ (launch ▶ to see)
⬇️这里是您在单元结束时将实现的一个示例。⬇️(启动▶查看)
1 | |
The environment 🎮
The Environment🎮(环境指南)
- Huggy the Dog, an environment created by Thomas Simonini based on Puppo The Corgi
The library used 📚
小狗Huggy,这是Thomas Simonini基于CorgiPuppo创建的环境图书馆使用的是📚
We’re constantly trying to improve our tutorials, so if you find some issues in this notebook, please open an issue on the Github Repo.
MLAgents(Hugging Face版)我们一直在努力改进我们的教程,所以如果你在这个笔记本上发现了一些问题,请在Github Repo上打开一个问题。
Objectives of this notebook 🏆
此笔记本电脑🏆的目标
At the end of the notebook, you will:
在笔记本结尾处,您将:
- Understand the state space, action space and reward function used to train Huggy.
- Train your own Huggy to fetch the stick.
- Be able to play with your trained Huggy directly in your browser.
Prerequisites 🏗️
了解用于训练Huggy的状态空间、动作空间和奖励函数。训练您自己的Huggy来获取球棒。能够直接在您的浏览器中与您训练的Huggy玩。必修🏗️
Before diving into the notebook, you need to:
在深入研究笔记本之前,您需要:
🔲 📚 Develop an understanding of the foundations of Reinforcement learning (MC, TD, Rewards hypothesis…) by doing Unit 1
🔲📚发展了对强化学习基础的理解(MC、TD、奖励假设…)通过学习单元1
🔲 📚 Read the introduction to Huggy by doing Bonus Unit 1
🔲📚通过做奖金单元1阅读关于Huggy的介绍
Set the GPU 💪
设置图形处理器💪
To accelerate the agent’s training, we’ll use a GPU. To do that, go to
Runtime > Change Runtime type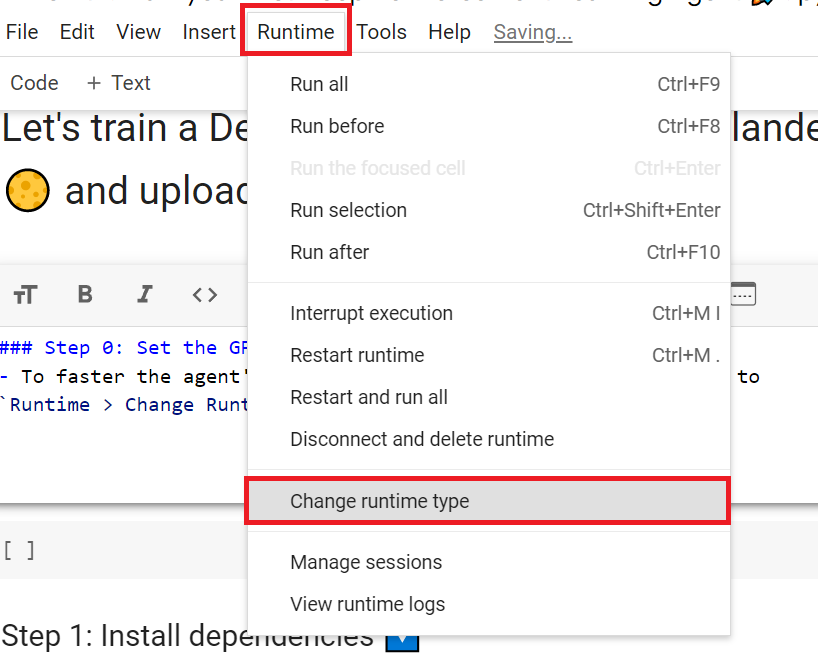
Hardware Accelerator > GPU
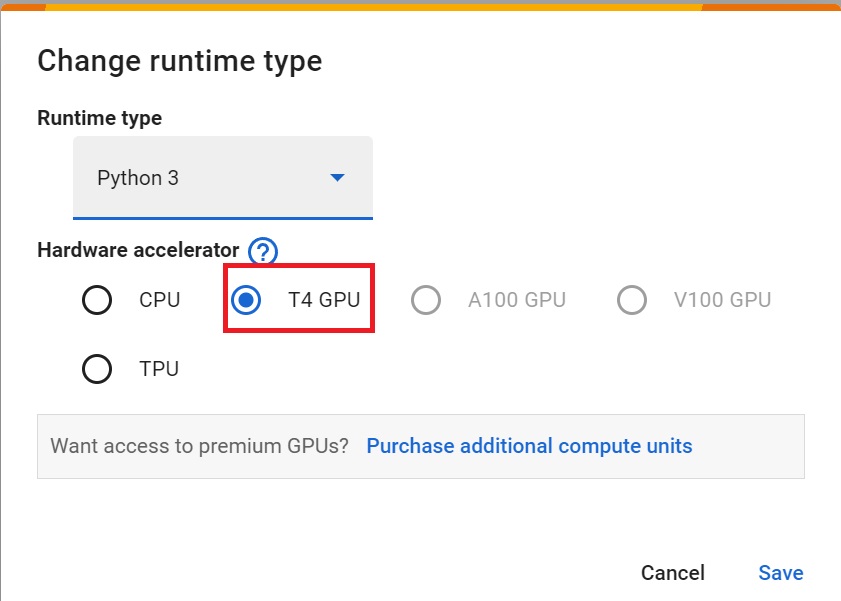
为了加快工程师的培训,我们将使用GPU。为此,请转到运行时>更改运行时类型GPU步骤1硬件加速器>GPUGPU步骤2
Clone the repository and install the dependencies 🔽
克隆存储库并安装依赖项🔽
- We need to clone the repository, that contains the experimental version of the library that allows you to push your trained agent to the Hub.
1 | |
1 | |
Download and move the environment zip file in ./trained-envs-executables/linux/
我们需要克隆存储库,其中包含库的实验版本,该库允许您将经过培训的代理推送到集线器。下载环境压缩文件并将其移动到./Traded-envs-Execuables/linux/中
- Our environment executable is in a zip file.
- We need to download it and place it to
./trained-envs-executables/linux/
1 | |
1 | |
Download the file Huggy.zip from https://drive.google.com/uc?export=download&id=1zv3M95ZJTWHUVOWT6ckq_cm98nft8gdF using wget. Check out the full solution to download large files from GDrive here
我们的环境可执行文件是一个压缩文件,我们需要将其下载并放置到./Traded-Envs-Executes/linux/使用wget从https://drive.google.com/uc?export=download&id=1zv3M95ZJTWHUVOWT6ckq_cm98nft8gdF下载文件Huggy.zip。点击此处查看从GDrive下载大型文件的完整解决方案
1 | |
Make sure your file is accessible
确保您的文件可访问
1 | |
Let’s recap how this environment works
让我们回顾一下这个环境是如何工作的
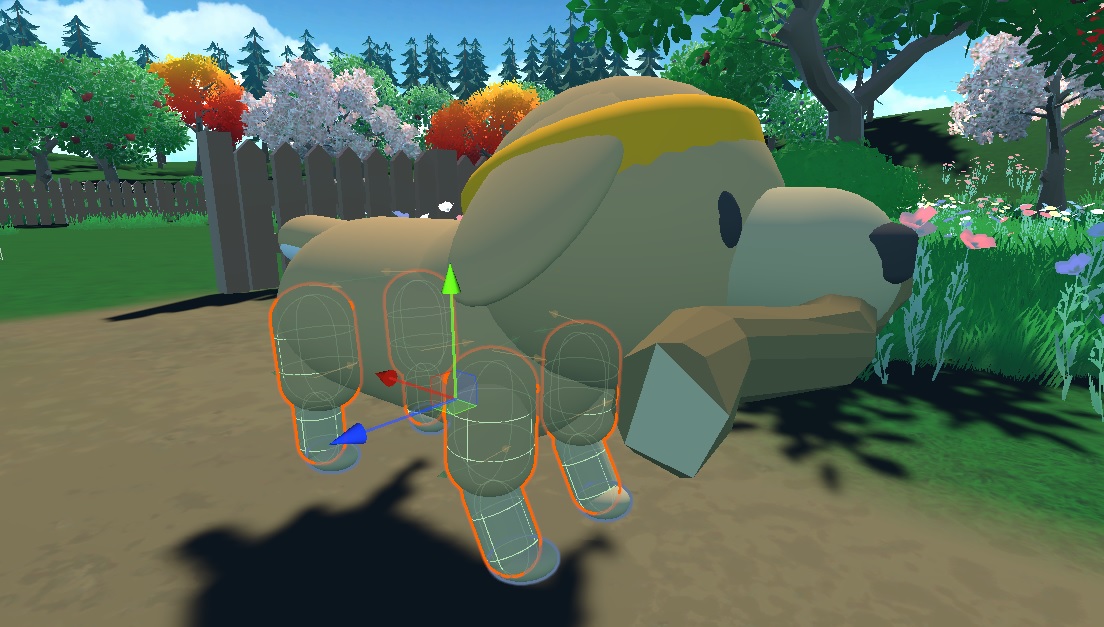
The State Space: what Huggy perceives.
状态空间:Huggy所感知的。
Huggy doesn’t “see” his environment. Instead, we provide him information about the environment:
Huggy没有“看到”他的环境。相反,我们向他提供有关环境的信息:
- The target (stick) position
- The relative position between himself and the target
- The orientation of his legs.
Given all this information, Huggy can decide which action to take next to fulfill his goal.
目标(棍子)位置他自己和目标之间的相对位置,他的腿的方向。根据所有这些信息,哈吉可以决定下一步采取什么行动来实现他的目标。
哈吉
The Action Space: what moves Huggy can do
动作空间:Huggy能做什么动作
Joint motors drive huggy legs. It means that to get the target, Huggy needs to learn to rotate the joint motors of each of his legs correctly so he can move.
抱抱动作关节电机驱动抱抱的腿。这意味着为了达到目标,Huggy需要学习正确地旋转他每条腿的关节马达,这样他才能移动。
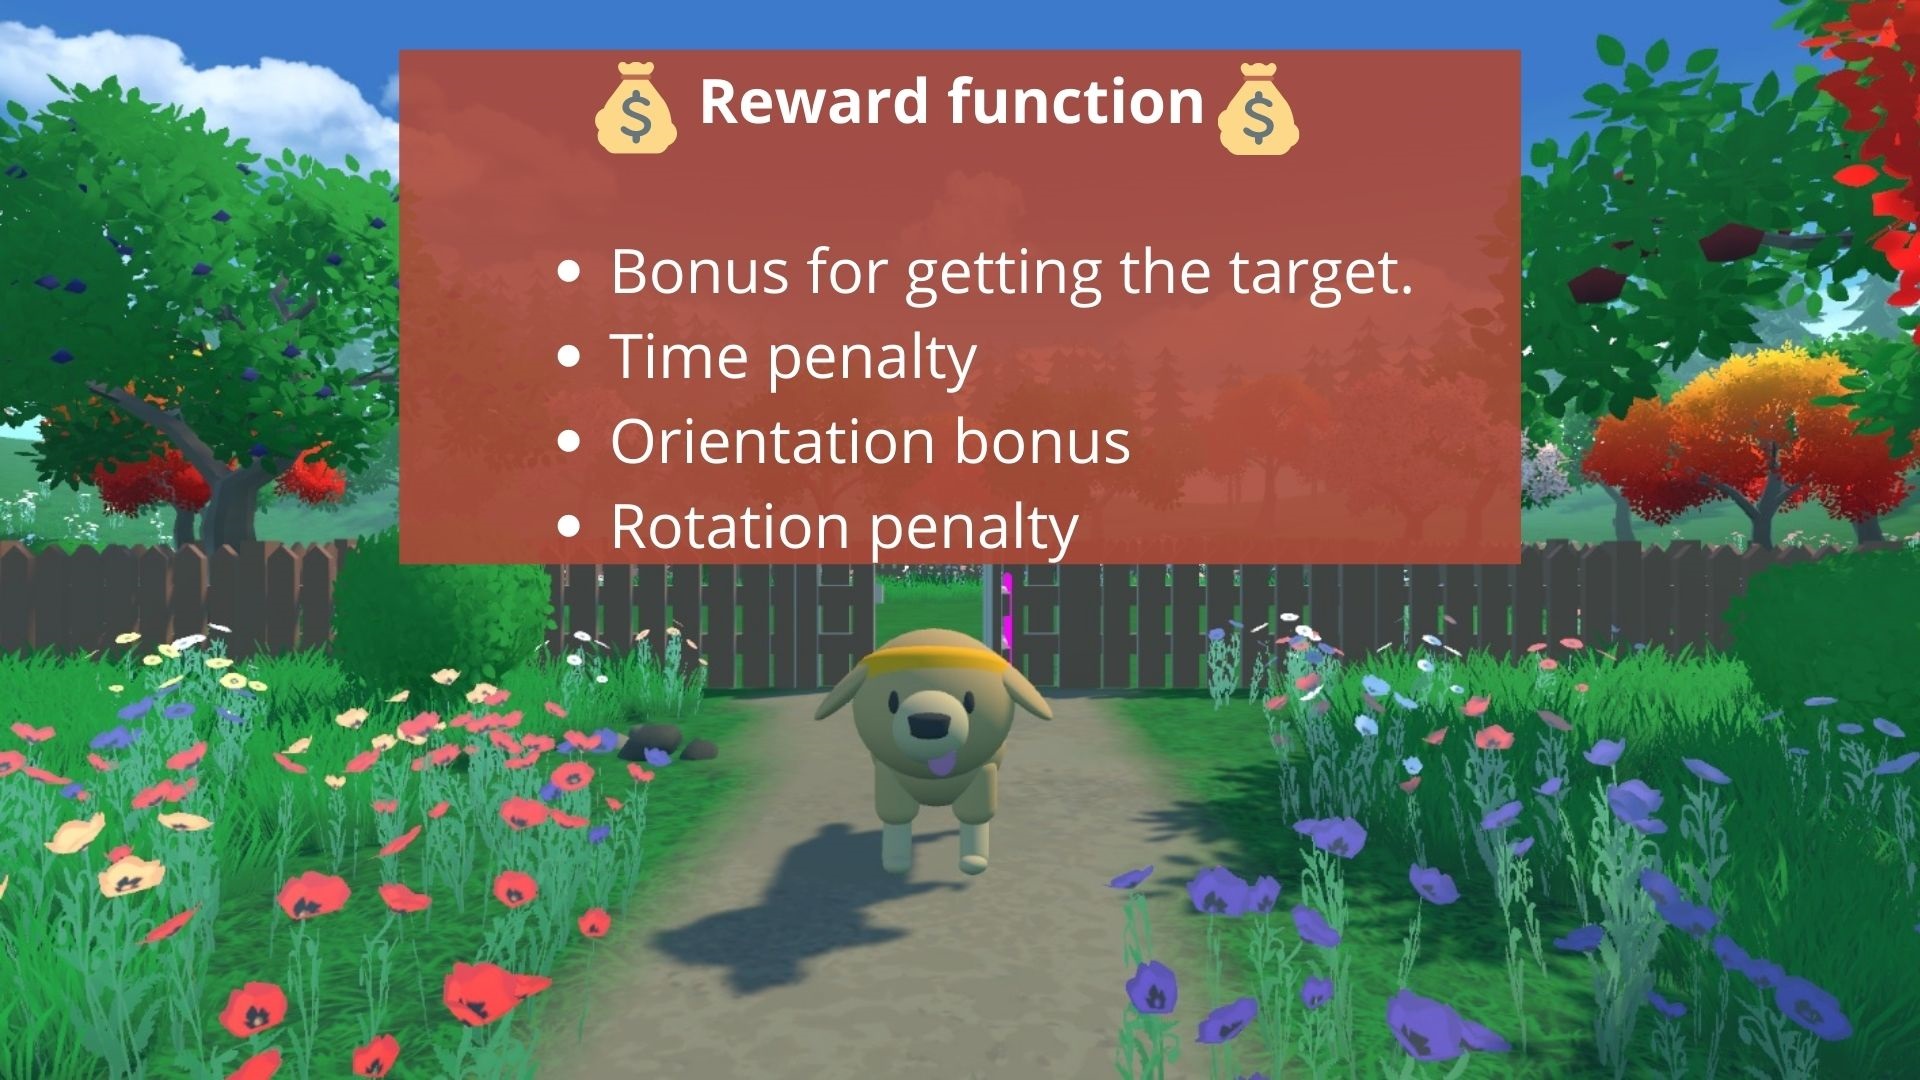
The Reward Function
奖励函数
The reward function is designed so that Huggy will fulfill his goal : fetch the stick.
奖励功能的设计是为了让Huggy实现他的目标:拿到棍子。
Remember that one of the foundations of Reinforcement Learning is the reward hypothesis: a goal can be described as the maximization of the expected cumulative reward.
记住,强化学习的基础之一是回报假设:目标可以被描述为预期累积回报的最大化。
Here, our goal is that Huggy goes towards the stick but without spinning too much. Hence, our reward function must translate this goal.
在这里,我们的目标是Huggy向球杆靠近,但不会旋转太多。因此,我们的奖励函数必须转化为这个目标。
Our reward function:
我们的奖励功能:
Huggy奖励函数
- Orientation bonus: we reward him for getting close to the target.
- Time penalty: a fixed-time penalty given at every action to force him to get to the stick as fast as possible.
- Rotation penalty: we penalize Huggy if he spins too much and turns too quickly.
- Getting to the target reward: we reward Huggy for reaching the target.
Check the Huggy config file
定向奖励:我们奖励他接近目标。时间惩罚:对他的每一个动作给予固定时间的惩罚,以迫使他尽快到达球杆。轮换惩罚:如果Huggy旋转太多,转身太快,我们就惩罚他。转到目标奖励:我们奖励Huggy达到目标。检查Huggy的配置文件
- In ML-Agents, you define the training hyperparameters into config.yaml files.
- For the scope of this notebook, we’re not going to modify the hyperparameters, but if you want to try as an experiment, you should also try to modify some other hyperparameters, Unity provides very good documentation explaining each of them here.
- In the case you want to modify the hyperparameters, in Google Colab notebook, you can click here to open the config.yaml:
/content/ml-agents/config/ppo/Huggy.yaml
We’re now ready to train our agent 🔥.
在ML-Agents中,您可以将训练超参数定义到Config.yaml文件中。在本笔记本的范围内,我们不会修改超参数,但如果您想尝试修改一些其他超参数,您还应该尝试修改其他一些超参数,Unity在此处提供了非常好的文档来解释它们。如果您想要修改超参数,可以在Google Colab笔记本中单击此处打开配置。yaml:/content/ml-agents/config/ppo/Huggy.yamlWe’re现在准备好培训我们的代理🔥。
Train our agent
培训我们的代理商
To train our agent, we just need to launch mlagents-learn and select the executable containing the environment.
要培训我们的代理,我们只需要启动mlAgents–学习并选择包含环境的可执行文件。
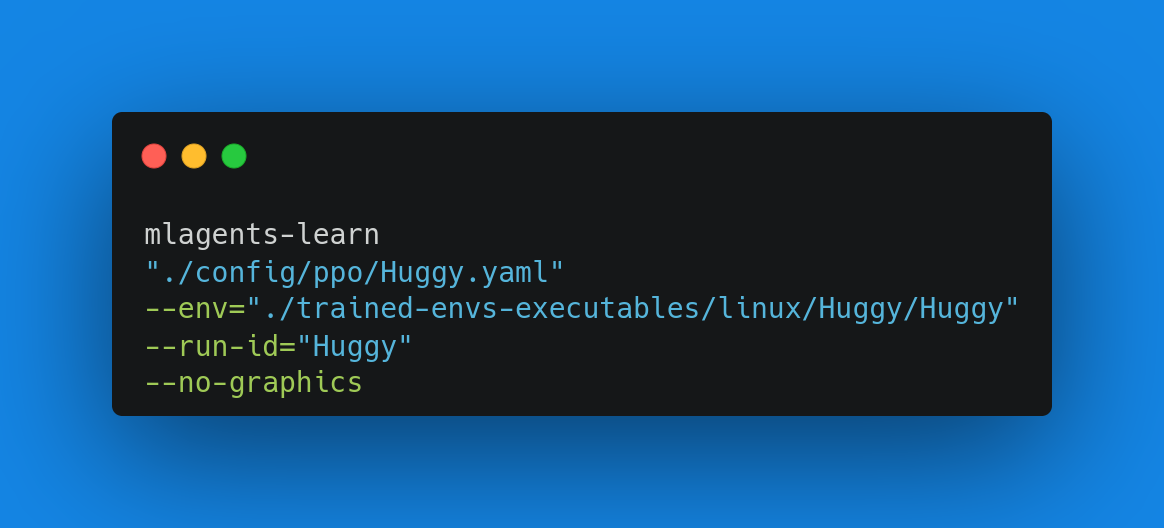
With ML Agents, we run a training script. We define four parameters:
ML学习函数与ML代理,我们运行一个训练脚本。我们定义了四个参数:
mlagents-learn <config>: the path where the hyperparameter config file is.--env: where the environment executable is.--run_id: the name you want to give to your training run id.--no-graphics: to not launch the visualization during the training.
Train the model and use the --resume flag to continue training in case of interruption.
`mlAgents-学习:超参数配置文件所在的路径。–env:环境可执行文件所在的位置。–run_id:训练运行id的名称。–no-raphics:在训练过程中不启动可视化。训练模型,并在训练中断时使用–ressue`标志继续训练。
It will fail first time when you use
--resume, try running the block again to bypass the error.第一次使用
--ressue会失败,请尝试再次运行该块以绕过错误。
The training will take 30 to 45min depending on your machine (don’t forget to set up a GPU), go take a ☕️you deserve it 🤗.
培训将需要30到45分钟取决于你的机器(别忘了设置一个图形处理器),去拿一个☕️你应得的它🤗。
1 | |
Push the agent to the 🤗 Hub
将代理推送到🤗集线器
- Now that we trained our agent, we’re ready to push it to the Hub to be able to play with Huggy on your browser🔥.
To be able to share your model with the community there are three more steps to follow:
现在我们培训了我们的代理,我们准备将其推送到中心,以便能够在您的浏览器🔥上与Huggy玩耍。要能够与社区共享您的模型,还需要执行三个步骤:
1️⃣ (If it’s not already done) create an account to HF ➡ https://huggingface.co/join
1到HF https://huggingface.co/join的️➡⃣(如果尚未完成)创建帐户
2️⃣ Sign in and then, you need to store your authentication token from the Hugging Face website.
2️⃣登录,然后,您需要存储来自Hugging Face网站的身份验证令牌。
- Create a new token (https://huggingface.co/settings/tokens) with write role
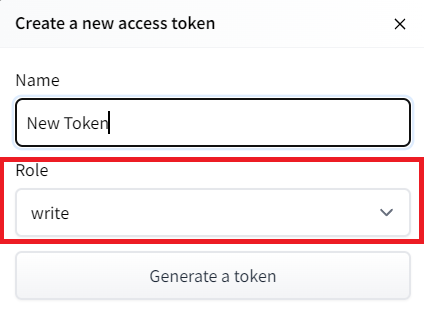
创建新令牌(具有写角色的https://huggingface.co/settings/tokens)创建HF令牌
- Copy the token
- Run the cell below and paste the token
1 | |
If you don’t want to use a Google Colab or a Jupyter Notebook, you need to use this command instead: huggingface-cli login
复制令牌运行下面的单元格并粘贴令牌如果您不想使用Google Colab或Jupyter Notebook,则需要使用以下命令:huggingfacecli login
Then, we simply need to run mlagents-push-to-hf.
然后,我们只需运行mlAgents-ush-to-hf即可。
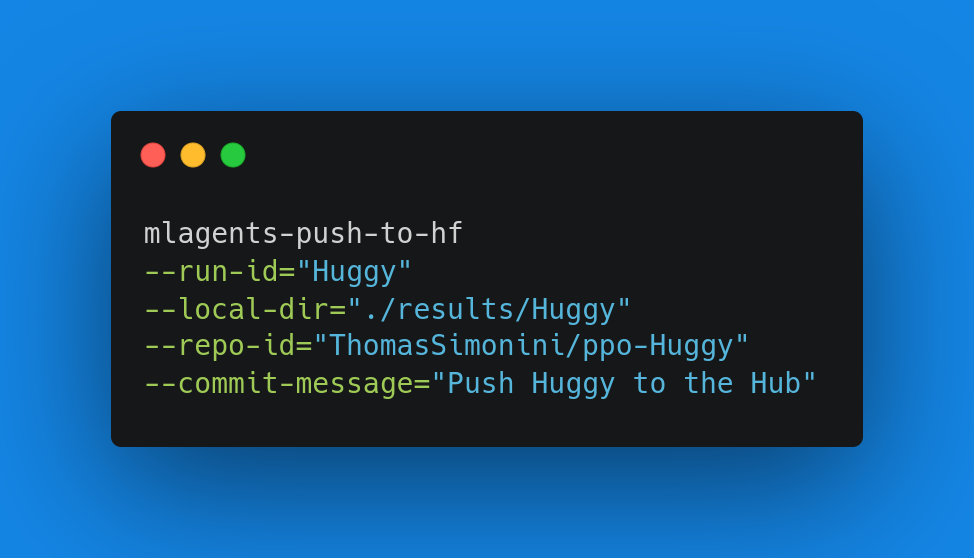
And we define 4 parameters:
ML学习函数,我们定义了4个参数:
--run-id: the name of the training run id.--local-dir: where the agent was saved, it’s results/<run_id name>, so in my case results/First Training.--repo-id: the name of the Hugging Face repo you want to create or update. It’s always/
If the repo does not exist it will be created automatically--commit-message: since HF repos are git repository you need to define a commit message.
1 | |
Else, if everything worked you should have this at the end of the process(but with a different url 😆) :
`–run-id:训练跑的名称id.–local-dir:代理保存的位置,结果/<run_id name>,所以在我的案例中,结果/First Training.–repo-id:您要创建或更新的Hugging Facerepo的名称。它总是/如果repo不存在,它将被自动创建–Commit-Message`:因为hf repos是GIT存储库,你需要定义一个提交消息。此外,如果一切正常,你应该在过程结束时拥有这个(但使用不同的URL😆):
1 | |
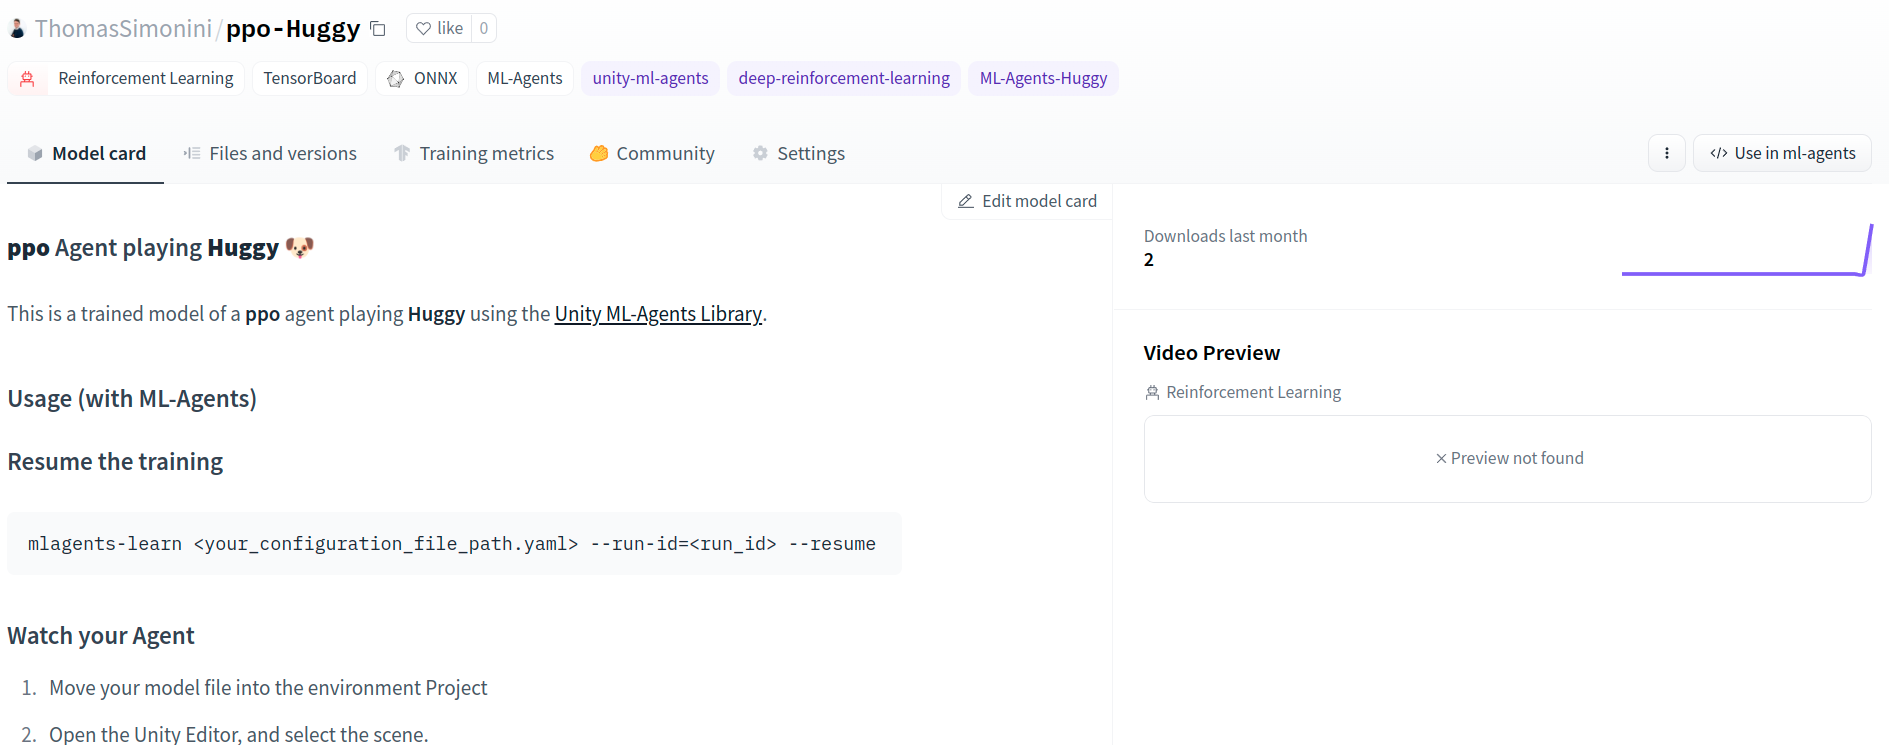
It’s the link to your model repository. The repository contains a model card that explains how to use the model, your Tensorboard logs and your config file. What’s awesome is that it’s a git repository, which means you can have different commits, update your repository with a new push, open Pull Requests, etc.
它是指向您的模型存储库的链接。存储库包含一个模型卡,它解释了如何使用模型、Tensorboard日志和配置文件。令人敬畏的是它是一个Git存储库,这意味着你可以有不同的提交,用新的推送更新你的存储库,打开拉请求,等等。
But now comes the best: being able to play with Huggy online 👀.
ML学习功能,但现在来了最好的:能够玩HUGGY在线👀。
Play with your Huggy 🐕
玩你的Huggy🐕
This step is the simplest:
这一步是最简单的:
- Open the game Huggy in your browser: https://huggingface.co/spaces/ThomasSimonini/Huggy
- Click on Play with my Huggy model
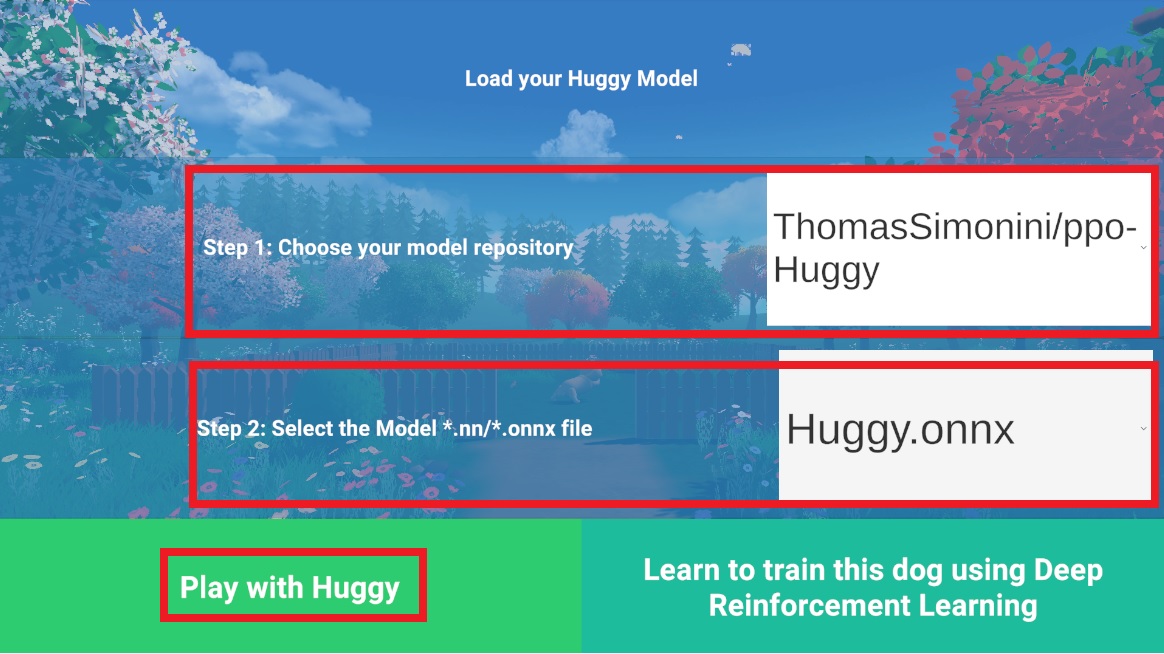
在浏览器中打开游戏Huggy:https://huggingface.co/spaces/ThomasSimonini/HuggyClick on Play With My Huggy Model Load-Huggy
- In step 1, choose your model repository which is the model id (in my case ThomasSimonini/ppo-Huggy).
- In step 2, choose what model you want to replay:
- I have multiple ones, since we saved a model every 500000 timesteps.
- But since I want the more recent, I choose
Huggy.onnx
👉 What’s nice is to try with different models steps to see the improvement of the agent.
在步骤1中,选择您的模型存储库,它是模型ID(在我的例子中是ThomasSimonini/ppo-huggy)。在步骤2中,选择您想要重放的模型:我有多个模型,因为我们每500000次保存一个模型。但由于我想要更新的模型,我选择Huggy.onnx👉。最好的是尝试不同的模型步骤,以查看代理的改进。
Congrats on finishing this bonus unit!
祝贺你完成了这个奖金单元!
You can now sit and enjoy playing with your Huggy 🐶. And don’t forget to spread the love by sharing Huggy with your friends 🤗. And if you share about it on social media, please tag us @huggingface and me @simoninithomas
你现在可以坐下来享受和你的HUGGY🐶一起玩了。别忘了和你的朋友🤗分享Huggy来传播你的爱。如果你在社交媒体上分享,请给我们@HuggingFace和我@simoninithoma贴上标签

抱枕盖子